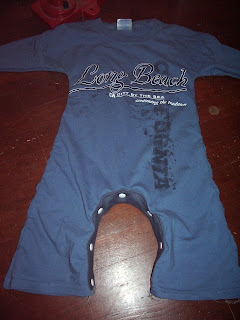
OK, so hopefully you’ve read the part about how to cut/sew the basic shape of the romper, and all that remains is to make the snap crotch (that sounds so weird!)
so, take one strip of stretchy coordinating fabric, serge the narrow ends, and line the ends up with the ends of one “U”, wrong sides together. Clip the ends and the mid-points together like this:

It should seem impossible to sew, but the stretch, assuming you cut it the right way, will STRETCH (and the crotch area is not a good area for oodles of extra fabric… taut is good!).
start serging, and as soon as the fabric is caught by the needle, start stretching the fabrics so they are the same size… (you might want to practice with some scraps, you need to stretch evenly, not pull, which could mess up the timing on your machine…)
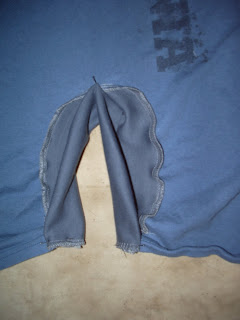
just for comparison, here’s the fabric, romper on top, edging on the bottom, before I stretch it

and here it is stretched…. see how I make them match up?

and here it is stretched…. see how I make them match up?


then turn down about 1/3 of the raw edge of the ribbing (just at the ends).


fold over again, so that the edging is folded in thirds, and the seam is covered on the right side of the garment. pin at the ends, and then pin in the middle….


now start stretching and pinning wherever you can (about every inch)

it should feel smooth when you stretch it taut… that way, you can iron it (with oodles of steam), and get something that looks this awesome:

isn’t that pretty and flat!!??!!
now, on the right side, SEW down as close to the edge as possible (I love my blind-hem foot for this purpose, and highly recommend them!), and then again, about 1/4 from the edge (lack of a good camera meant all the pics of this were blown out and blurry, so you have to imagine how to sew a straight line along the edge ON the edging, covering the serged seam)

TADA!
now you just have to put in snaps!
Measure the front crotch, roughly in the middle of the edging piece

do math (or just guess based on how many snaps you have…) to figure out where to place the snaps (I did mine every 2.5″ and really like that spacing!)
use a sharpie (or whatever) to mark your snap placement ON THE RS OF THE FRONT.
(I’m going to simplify snap parts… there’s a flat side, and a functional side (the functional side is either male or female, one of each, obvi, to make a working snap), but as long as you do ALL male on one romper side, and all female on the other romper side, it doesn’t seem to matter which is which)
so the RS of the front will have flat parts, and the WS of the front will have functional parts.


I find it easiest to make a hole with a yarn/tapestry needle and then push my flat piece in, but the prong snaps are sharper, and will go through more easily, I think)

when all the front snaps are in, pin the ends of the front and back together, overlapping with the front on the bottom, and (using your knee, or someone else’s hands) stretch so the pieces are flat.


Put the flat snap pieces on the INSIDE (WS) of the back, and the functional pieces on the RS (outside) of the back. this way the crotch strips will overlap in the crotch, which is ideal (if this is confusing, look at some RTW snap crotch pants before you put ANY snaps in!)