I, too, saw THIS on This Mama Makes Stuff, and fell in love… I figured I’d get around to making one of my own at some point, but I was going to wait till she posted a tutorial (fingers crossed)…
but then, this morning, I saw that Jill had posted THIS, so I used her measurements (roughly), and made one of my own from scraps:

YAY! so, for those of you still waiting, here’s a tute on how to make my version:
You need a front piece that is 20″ x 10″, a connector piece that’s 4″ x 7″ (I went a little longer on this than Jill did, because the gap between the seat and back on our chair seems higher than hers) , and a strap piece that is 6″ x the width of your fabric (unless you want it shorter, don’t bother measuring; it’ll be between 40-45, depending on the manufacturer)
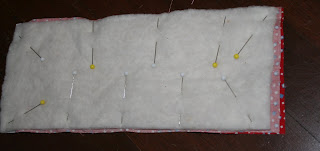
Cut each piece out of 2 fabrics and 1 batting, and make a sandwich with batting on top of the two fabrics (right sides together)
start with the smallest rectangle,the connector piece, make your sandwich, and then sew the two long sides, leaving the short sides open:
but then, this morning, I saw that Jill had posted THIS, so I used her measurements (roughly), and made one of my own from scraps:
YAY! so, for those of you still waiting, here’s a tute on how to make my version:
You need a front piece that is 20″ x 10″, a connector piece that’s 4″ x 7″ (I went a little longer on this than Jill did, because the gap between the seat and back on our chair seems higher than hers) , and a strap piece that is 6″ x the width of your fabric (unless you want it shorter, don’t bother measuring; it’ll be between 40-45, depending on the manufacturer)
Cut each piece out of 2 fabrics and 1 batting, and make a sandwich with batting on top of the two fabrics (right sides together)
start with the smallest rectangle,the connector piece, make your sandwich, and then sew the two long sides, leaving the short sides open:
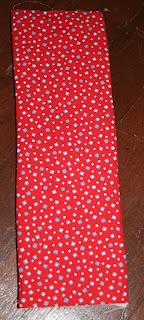
here’s a pic of the long sides after they’ve been sewn… (not sure why I took this shot, but I did, so here it is)

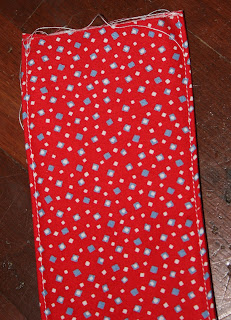
Turn it right side out, and, just to make it look pretty and have a teeny bit more stability, edgestitch both long sides.

The short sides can be left open (or closed, if you’d rather, they’ll be hidden INSIDE the two larger pieces, so they don’t matter)

Make a pin sandwich of each of the larger rectangles, curving the corners as you sew (I suppose this is optional, if you like square corners). Leave a hole in the middle of one of the 10″ sides on the front flap, and in the middle of a long side on the wrap piece. This is the hole for turning right side out, and for attaching the connector piece later.
Here’s a closeup, so you can see how the edgestitching closed the turning hole, and attached the connector piece…

Once you’ve attached the connector piece to both pieces, and edgestitched all the way around both, all that remains is to sew on some hook’n’loop tape (aka: Velcro)
Make sure you sew the tape on opposite sides so the wrap piece can wrap. I cut my tape about 12″ long, and zigzagged the pieces down the middle of the wrap piece.
That’s a view of the reverse… (it’s a tomato print, it seemed fitting to do a food print on a highchair.)
Here it is on the chair, waiting for the baby:
She’s a pretty happy camper in there, so I call this a success!
There IS a lot of room in that super long strap, but it doesn’t bother me, and if I had to go all the way around a chair, it would get used up pretty quickly. Of course, the seat might also be slightly less safe…
Eh, leaving it long is just easier, and she might grow… someday… so long it stays.

